Introduction
Leathercraft is one of those timeless crafts that marries art with utility. Whether you’re a creative beginner or someone dipping a toe into a historic trade, leathercraft welcomes you with open arms. In this post, I’ll help demystify the basics—from the history and cultural backdrop of working with leather to the hands-on techniques you can start practising today. Expect insights into the right tools, a few safety tips, and examples of simple projects you can tackle in your own home workshop.
A Brief History of Leathercraft
Leather has been a vital material for humankind for thousands of years. In medieval times, leather was not only used for garments and footwear but became essential in creating saddles, armour, and even intricate book bindings. This craft evolved over centuries as artisans developed methods to treat, cut, dye, and shape leather into beautiful, functional pieces. Working with leather is, in many ways, a living history lesson—allowing modern makers to connect with traditions that date back to early civilisation. This rich heritage lends a sense of continuity and authenticity that few crafts can match.
Why Leathercraft?
For many UK makers, leathercraft represents both an artistic outlet and a practical skill. Leather’s durability, natural beauty, and versatility mean that handmade items such as wallets, belts, and keychains can stand up to everyday abuse while looking beautifully unique. Moreover, leathercraft offers a satisfying tactile experience: the process of cutting, tooling, and finishing each piece is as much meditative as it is creative.
Embracing leathercraft means not only learning a new skill but also becoming part of a creative community that values quality, tradition, and innovation. Once you start moulding your own materials into lasting, personalised items, you’ll soon find that this craft touches both the aesthetic and functional sides of design.
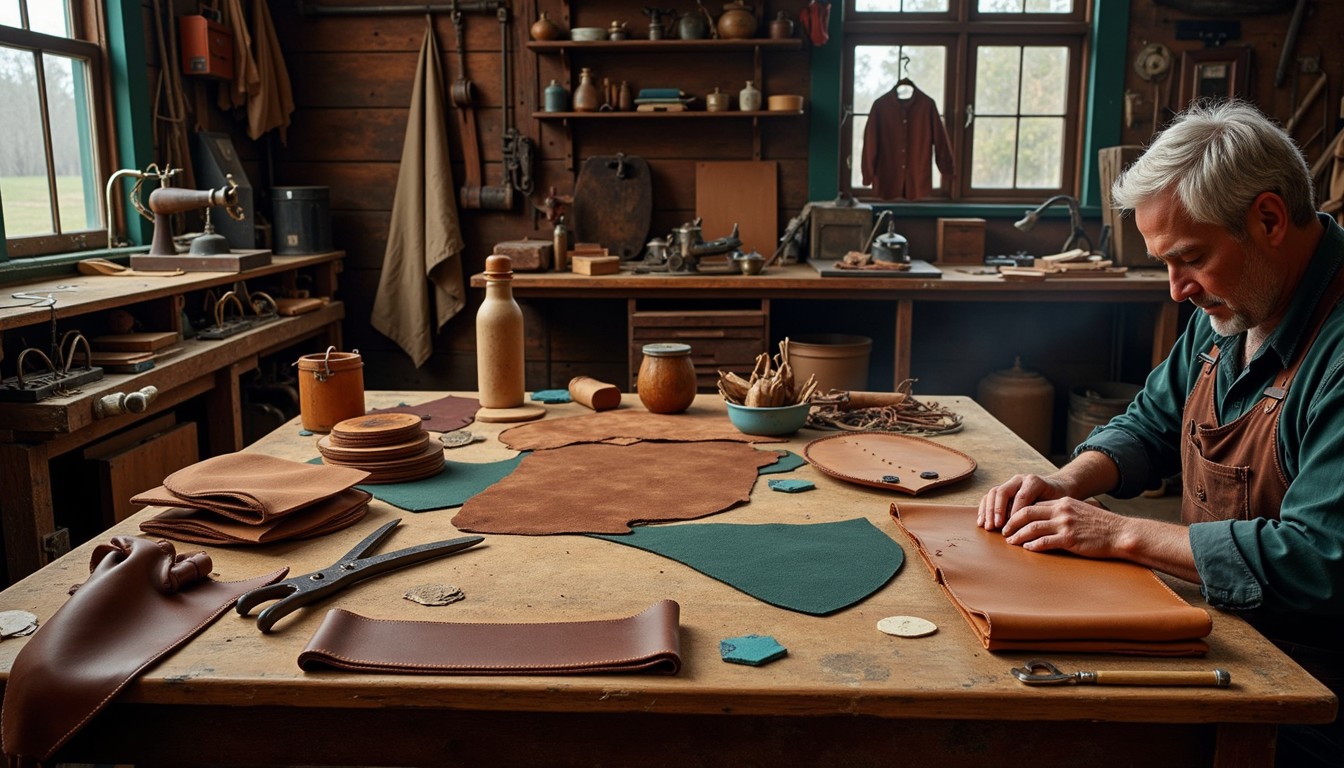
The Essential Tools – A Deep Dive
Before your first cut, you need to invest in the proper tools. A solid toolkit may seem expensive initially, but quality tools can last many years—and eventually, your work will speak for itself.
Cutting Tools
- Utility Knives and Rotary Cutters: Precision is key. A sharp blade ensures a clean cut, and having an assortment of blades (or a rotary cutter with replaceable heads) is crucial. For beginners, a self-retracting knife is a safe and efficient starting point.
- Leather Scissors: Specialised heavy-duty scissors help trim pieces with finesse, especially when working with thinner leathers.
Stitching Tools
- Needles and Awls: Leather needles are sturdier than those used for fabric. An awl is indispensable for marking stitching holes, ensuring your stitches are evenly spaced before you begin.
- Waxed Thread: This isn’t just any thread; waxed thread adds durability and helps lock your stitches in place. Experiment with colours to add a subtle decorative touch.
- Stitching Groovers: For those who want a professional finish, a stitching groover machine or hand tool grooves the leather surface to guide your stitches for a refined look.
Edge and Surface Tools
- Burnishers and Slickers: These tools smooth and polish the edges, giving your project that professional, refined finish.
- Bevelers: To create angled or rounded edges, bevelers help transform a raw cut into beautifully finished detail.
- Dye Brushes and Applicators: When it comes to adding colour or a protective finish, the right tools make all the difference.
Investing in quality tools is a key early step—your technique will improve as you learn what each tool can do. Many UK craft suppliers offer starter kits at reasonable prices, making it easier to get everything you need without breaking the bank.
Mastering the Basic Techniques
Now that you have your tools, what comes next? It’s time to get your hands (and leather) dirty with some basic techniques.
Cutting Your Leather
Before you even think of marking your design, ensure you have a clean, clutter-free work surface with a reliable cutting mat. When laying out your pattern on the leather, measure twice and cut once. A sharp utility knife or rotary cutter will give you a crisp edge. The quality of your cut will influence not only the aesthetics but also the structural integrity of your final piece.
Punching and Marking
Once your leather is cut to size, the next step is marking where your stitches or decorative designs will go. Use a combination of a marking pen and a stitching chisel or awl. For beginners, gently practice punching evenly spaced holes in scraps until you’ve developed a steady hand. This is the bedrock of proper stitching.
Stitching Techniques
There are a few stitching techniques popular in leathercraft: saddle stitching is one of the most durable and traditional methods. For a beginner project, try a simple saddle stitch on a piece of scrap leather. First, thread two needles with waxed thread. Then, working from opposite ends, push the needles through pre-punched holes. The method requires a bit of coordination, but your first successful stitches will be incredibly rewarding. Over time, as your fingers gain muscle memory, you’ll be able to work faster and with more precision.
Edge Finishing
Burnishing is where raw edges transform into a beautifully smoothed finish. There are simple burnishers available for home use, or you can even try using sandpaper for a more rudimentary approach. For best results, dampen the edge slightly and maintain steady, even pressure as you work along the length. Your patience will pay off when you see those edges go from rough to refined.
Projects to Kick-Start Your Craft
Starting small is key to building your confidence. Here are a few projects perfect for beginners:
Leather Keychains
A simple keychain project introduces you to cutting, punching, stitching, and finishing. With minimal material required, you can experiment with shapes, embossing techniques, or even add a splash of dye to personalise your design.
Cardholders
A slightly more challenging project, cardholders require precise cutting and a neat stitch line. Success here means a functional accessory you can use every day, or even gift to a friend.
Simple Wallets
Wallets combine several techniques—from cutting and folding to stitching and edge finishing. Although slightly more complex, the reward is a durable, custom piece that stands out in a sea of mass-produced alternatives.
Each project offers its own set of technical challenges and creative opportunities. Start with a design that excites you, keep your tools close at hand, and don’t worry if every piece isn’t perfect—the journey is all about learning and refining your technique.
Troubleshooting and Common Pitfalls
Every craftsman faces hiccups along the way. Here are some common pitfalls and tips to overcome them:
- Dull Blades: A dull blade results in ragged, uneven cuts. Always have a spare set of blades ready and take the time to sharpen your knives regularly.
- Uneven Stitching: If your stitches aren’t even, try marking your dots before you stitch. Practice on scrap leather until your technique becomes second nature.
- Overworking the Edge: When burnishing, too much pressure can lead to an overburnished look, where the leather’s edges become overly smooth or glazed. The trick is to work evenly, checking your progress as you go.
Remember that each mistake is a learning opportunity. Many experienced leatherworkers will tell you that the early errors form the foundation for future improvement. Patience, practice, and persistence are your best allies.
Safety and Workspace Setup
A well-organised workspace is crucial for successful leathercraft. Here are some tips for creating a safe and efficient environment:
- Lighting: A bright, well-lit area helps you see the subtle differences in colour and texture as you work.
- Cleanliness: Keep your tools organised and your workspace free of clutter, especially when using sharp cutting tools.
- Ventilation: If you’re dyeing or using adhesive products, ensure your workspace is well ventilated to avoid inhaling any fumes.
- Protective Gear: Consider wearing an apron and cut-resistant gloves to reduce the risk of injury.
By carefully planning your workspace and sticking to safety protocols, you create an environment that nurtures creativity while minimising accidents.
Developing Your Confidence
One of the most magical aspects of leathercraft is that every mistake is a lesson learned. As you gain confidence—from your first unsteady cuts to perfectly executed stitches—the artistry of leatherwork becomes a personal journey. Experiment with different textures, try out new dyes, and don’t be afraid to push your creative boundaries. You might even find that the imperfections in your work add character and charm, telling the unique story of your progress and creativity.
Final Thoughts
Getting started with leathercraft is like stepping through an open door into a world where the tactile meets the creative. Every cut, every stitch, and every burnished edge is a moment to enjoy and learn from. With the right tools, some basic techniques, and a bit of practice, you’ll soon find yourself creating pieces that are not only beautiful but deeply personal. Remember that mastery comes with time, and every artisan started exactly where you are right now.
Keep experimenting, asking questions, and sharing your progress with your local maker community. Your journey with leathercraft isn’t just about the final product—it’s about the transformation that happens along the way. Embrace the challenge, and most of all, enjoy the process.