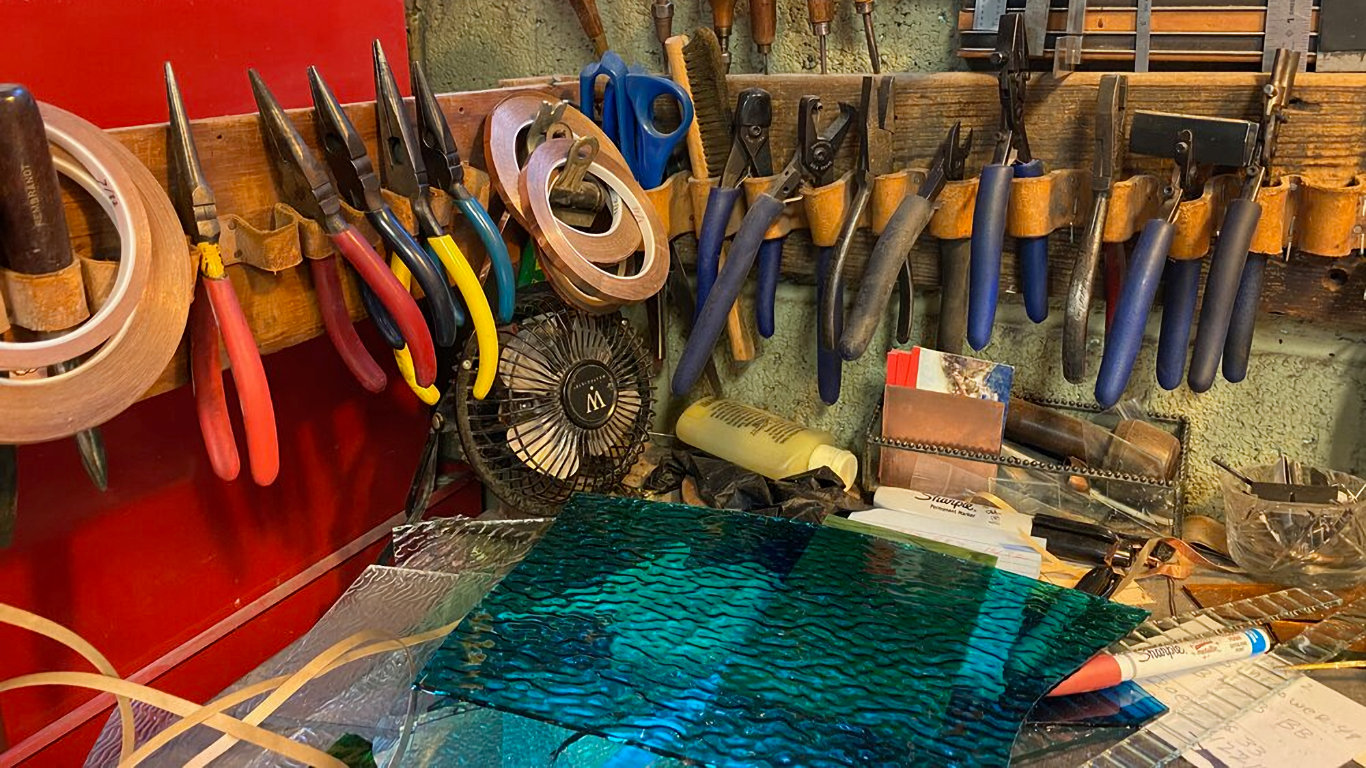
Glass art is one of those hobbies that looks simple… until you realize you’ve slowly acquired a collection of tools that rivals a medieval torturer. When I first started, I thought I could get by with a cheap cutter, a soldering iron from the hardware store, and a dream.
Let’s just say that dream cracked — loudly — somewhere around attempt number four.
This article is thank you to the tools that helped me grow, frustrated me until I learned how to use them, and, yes, occasionally broke in my clumsy beginner hands. Here’s my journey through the essential tools of glass art — from first buys to forever keepers.
My First Cutter and Why It Still Has a Name
Let’s talk about Snappy.
Snappy was a budget, yellow translucent plastic-handled glass cutter I got in a starter kit. He squeaked when I scored, leaked oil inconsistently, and made a crunching sound I later learned was a very bad sign. But I used Snappy on my first suncatcher, my first panel, and my first-ever decent circle (which took 12 tries).
He wasn’t perfect, but Snappy taught me the basics: pressure, speed, angle, and — perhaps most importantly — patience.
Eventually, I retired Snappy in favour of a self-oiling pistol grip cutter. But I keep him in my toolbox as a reminder: you don’t need perfect tools to start — just determination.
The Tool I Thought Was Useless (Until It Wasn’t)
For the longest time, I ignored the weird little plastic thing in my starter kit: a fid, as I was informed by a knowledgeable friend.
It looked like a pointy, curved stick. I thought it was maybe for scraping glue or stirring flux. Wrong.
Turns out, a fid is a burnishing tool — and it changed my copper foiling game. Before using it properly, my foil would lift, wrinkle, or shift during soldering. Once I learned how to press and smooth with the fid (especially along edges), my solder lines transformed.
If you don’t know what a tool does, look it up before tossing it aside. Some of them are quiet geniuses.
Tools I Broke and Lessons They Taught Me
Oh yes. I broke a few.
1. Inexpensive Glass Grinder
I bought a small, off-brand grinder online. It had poor water flow, a weak motor, and no splash guard. Within a month, the bit seized. Lesson? Don’t skimp on core tools. A good grinder saves time, reduces frustration, and lasts years.
2. Budget Soldering Iron
It was meant for electronics, not glass. No temperature control, inconsistent heat, and the tip oxidized like crazy. It made soldering a nightmare. I switched to a Weller 100W with adjustable heat — and never looked back.
3. Foil Dispenser Tape Holder
I once made my own from duct tape and cardboard. It worked for five minutes. Just buy the real thing. Your foil rolls will thank you.
How to Avoid the Cheap Stuff That Doesn’t Last
Let’s be real: glass tools can get expensive fast. But there’s a middle ground — smart investing.
Spend more on:
- Glass cutters
- Grinder
- Soldering iron
- Safety gear (goggles, masks)
Save on (or DIY):
- Layout boards (use plywood + grid paper)
- Horseshoe nails (hardware store versions work great)
- Small containers for flux and patina
- Avoid no-name tool kits that promise “everything you need” for $39. If it sounds too good to be true…
Worth-the-Splurge Gear for Serious Fun
Once I knew I was in this for the long haul, these tools earned permanent status in my studio:
- Self-oiling Glass Cutter (Pistol Grip) – It’s ergonomic, clean, and consistent. Feels like cutting with confidence.
- Inland or Gryphon Grinder – A good grinder saves hours. Look for one with a solid work surface and easy bit change.
- Hakko or Weller Soldering Iron – Adjustable temperature is a must. It prevents overheating your foil and controls your solder flow.
- Quality Safety Gear -I wear wraparound goggles (glass can splinter) and a dust mask when grinding. Health first.
Maintenance and Storage: Love Your Tools Back
Tools love a little attention:
- Clean your iron tip with a wet sponge and re-tin it after use.
- Empty grinder water and clean the tray regularly.
- Oil your glass cutter weekly or whenever the wheel feels dry.
- Store foil upright to prevent it from flattening.
- I keep a small “tool care” box with sponge, cutter oil, cleaning brush, and extra bits. It’s my little spa for tired tools.
Unexpected Favourites in My Kit
Some tools I didn’t expect to love became absolute must-haves:
- Running pliers: The first time they snapped a perfect curve — wow.
- Grozing pliers: For nipping and shaping edges just right.
- Circle cutter: Makes symmetry (and lamps!) so much easier.
- Foil crimper: A luxury item, but it saves time and makes perfect folds.
Organizing for Creativity
A messy studio can slow you down. I use:
- Magnetic strips to hold pliers and cutters
- Plastic drawer bins for foil, flux, and findings
- Pegboard for hanging patterns and small tools
- Labels — lots of them!
When everything has a place, your creativity flows faster.
Tool Talk with Fellow Artists
Whenever I visit a glass studio or talk to other artists, we always end up discussing tools. There’s a joy in sharing what works, what didn’t, and what’s new.
If you can, borrow or try tools before buying. Some studios let you test equipment. Others have second hand gear or discounts for members.
And don’t be afraid to ask: “What’s the one tool you can’t live without?” The answers are always surprising — and super helpful.
Remember it’s Not the Tools, It’s You (Mostly)
Yes, good tools matter. But they’re not magic. They won’t make you a great artist overnight.
What makes the difference is how you use them, how often you practice, and how well you listen to your materials. Still — a well-balanced cutter or a smooth-gliding soldering iron can turn struggle into joy.
So treat your tools with love. Invest slowly and wisely. And when you find one that just fits — that becomes an extension of your hand — give it a name.
Snappy would be proud.